
Can Bathroom Fitting Damage My Walls or Floors?
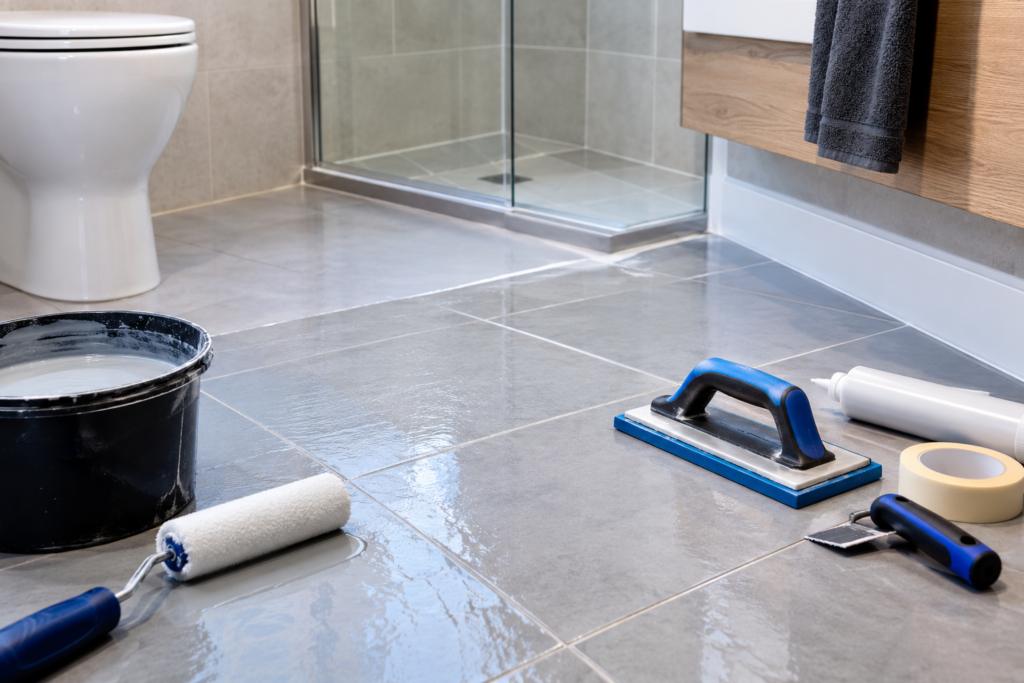
Quick Answer Yes, a bathroom fitting can damage your walls or floors, but it usually happens only when the job is rushed, badly planned or handled by someone without the right experience. Most damage comes from stripping off old tiles, fixing heavy units to weak walls and cutting into floors for new pipework. A skilled fitter plans around these risks, protects your home and puts right any disturbance before leaving. This guide covers what can go wrong, which parts of your home are most at risk and how to keep everything in good shape. What Can Go Wrong During a Bathroom Fitting Most problems are small and easy to repair. A few turn serious if nobody spots them early. Cracked plaster: Pulling off old tiles often takes the plaster with it, especially on older walls. Chipped or loose tiles: Heavy tools and falling fittings can crack tiles in the bathroom and in nearby rooms. Scratched flooring: Dragging a cast iron bath or a vanity unit across laminate, wood or vinyl leaves deep marks. Damaged floorboards: Cutting channels for waste pipes can weaken boards and joists if done carelessly. Water damage: A badly sealed joint or shower tray lets water into the subfloor and the ceiling below. Holes in the wrong place: Drilling without checking for cables or pipes can hit a live wire or a water pipe. Dust and debris: Plaster dust and tile fragments scratch floors and spread through the house. Which Walls and Floors Are Most at Risk Not every home reacts to a bathroom refit in the same way. The age of the house and the materials used change the level of risk. Older properties with lime plaster or lath and plaster walls are the most fragile. They crack easily when tiles are pulled away, and fixings do not hold well. Newer homes with plasterboard walls are more forgiving, but heavy cabinets and radiators still need proper fixings. Plaster walls: Can crack or come away in sheets when tile is removed. Plasterboard: Can crumble around poor fixings and soak up water at cut edges. Timber floors: Can be weakened by deep notches in joists and may squeak once new pipework goes in. Concrete floors: Strong, but chasing for pipes makes dust and needs neat patching afterwards. Ceilings below the bathroom: Can stain or sag if a leak goes unnoticed. If you live in an inter war semi, the risks above are very common. We see them often when we carry out a bathroom installation in Crayford, where many houses have extended bathrooms and older pipework. Damage Risks at a Glance Area Typical damage Main cause How to prevent it Plaster walls Cracks and blown plaster Tile removal Score tile edges, remove slowly, reskim after Plasterboard Crumbling at fixings Heavy units without support Fix to noggins or use fixings rated for the load Timber floors Weak joists, squeaks Deep notching for pipes Drill along the centre line of joists and avoid deep notches Concrete floors Cracks and dust Chasing for waste pipes Cut neat channels and patch with proper screed Hallway and stairs Scratches and dents Carrying baths and tools Lay protective boards Ceiling below Stains and sagging Leaks from poor sealing Pressure test and seal every joint Hidden Problems a Refit Can Uncover Sometimes the damage was already there. Stripping a bathroom back shows what old tiles and panels were hiding. Rot: Years of small leaks can soften floorboards and joists. Damp and mould: Often found behind old panels and under baths. Lead pipes: Homes built before 1970 may still have lead pipes that should be replaced during the work. Asbestos: Textured coatings and old floor tiles in homes built before 2000 may contain asbestos. Never disturb them. Get a licensed test first. Old wiring: Cables that fail current Part P standards need attention before new lights, fans or heated mirrors go in. Finding these early is a good thing. It lets you fix the cause rather than cover it with new tiles. Older terraced streets are where we find these most often. In a Victorian or Edwardian terrace, the bathroom is usually tucked into a back extension, and the pipework behind the bath panel can be as old as the house. That is something we plan for on every bathroom installation in Dartford. How a Good Fitter Protects Your Walls and Floors Damage prevention starts long before the first tile comes off. Here is how DynamicPlumb approaches a careful bathroom installation from the first visit to the final clean up. Before the Work Starts A site visit to check walls, floors and pipe routes. A cable and pipe detector scan before any drilling. Photos of the existing condition of every room the fitter will pass through. A clear plan for where waste pipes and supply pipes will run. While the Work Is Happening Protection boards laid from the front door to the bathroom. Dust sheets and sealed doors to keep dust out of other rooms. Proper noggins or support boards behind heavy units. Tanking and waterproof backer boards in shower areas and around baths. After the Work Is Finished A pressure test on all new pipework. A check of the seals around the bath, shower tray and basin. A full clean up and a walk through with you. Repairs to any marks before final payment. Questions to Ask Before You Hire a Bathroom Fitter A few direct questions tell you a lot about how a company works. Do you carry public liability insurance, and can I see the certificate? Will you photograph my floors and walls before you start? How do you protect floors between the front door and the bathroom? Who repairs plaster, tile or floor damage if it happens? Are your plumbers registered with WaterSafe and the Gas Safe Register where gas work is involved? Is there a written quote that covers making good after the work? How to Prepare Your Home Before the Fitters Arrive A little preparation cuts the chance of
Can You Add Underfloor Heating to an Existing Bathroom?
Quick Answer: Yes, you can add underfloor heating to an existing bathroom, and electric underfloor heating mats are the easiest way to do it. They sit under the floor covering, add only a few millimetres of height, and suit small rooms. The catch is that the old floor covering has to be lifted and relaid, because the heating goes underneath it. Water underfloor heating can be fitted too, but it raises the floor more and needs a connection to your central heating. How to Add Underfloor Heating to an Existing Bathroom Step by Step Follow these nine steps in order. Steps 1 and 2 are planning, steps 3 to 6 are the floor work, and steps 7 to 9 finish the job. What You Need Before You Start A heating mat or loose heating cable sized to your floor area Insulation boards to go under the heating A floor sensor thermostat with a timer A 30mA RCD on the supply, fitted by an electrician Tile adhesive and grout that suit underfloor heating A multimeter to test the heating before it is covered Step 1: Choose Between Electric and Water Underfloor Heating For most bathrooms, electric underfloor heating is the practical choice. It is thin, quick to fit and does not need to connect to the boiler. Water underfloor heating uses pipes linked to your heating system, so it suits larger areas or a full renovation. A comparison table later in this guide shows the differences. Step 2: Check the Floor and the Height You Can Spare Every layer you add raises the floor, so measure first. Check these points: Door clearance. Will the door still open over the new floor? Threshold height. Will there be a step into the bathroom? Toilet and bath edges. Do the fittings still sit at the right height? The floor base. It must be firm, level and dry. Not sure your bathroom floor can take it? Get your free quote or call 07477 863654. Step 3: Lift the Old Floor Covering and Prepare the Base Most systems go underneath the floor finish, so the old tiles or flooring come up. Remove the old covering, scrape off adhesive, repair any damage and clean the base. On a timber floor, make sure the boards are secure and the surface is flat. Step 4: Lay Insulation Boards Insulation boards push the heat up into the room instead of down into the floor. They also make the system more efficient. Fix the boards to the base and seal the joints, following the maker’s instructions. Step 5: Fit the Heating Mat or Cable Plan the layout so the heating covers the open floor, not the area under the bath, toilet or units Roll out the mat from one edge of the room and cut the mesh, not the cable, to turn at the end of a run Keep cables apart. They must never cross or touch each other. Keep the cold tail (the supply lead) in a position that reaches the thermostat Step 6: Fit the Floor Sensor and Test Before Tiling Place the floor sensor between two heating runs and run its lead to the thermostat position. Test the heating with a multimeter before you cover it, and again after tiling begins. A fault found now is easy to fix. A fault found under finished tiles is not. Step 7: Wire the Thermostat and RCD This step needs an electrician. Part P of the Building Regulations covers this kind of work, and the heating must be protected by a 30mA RCD. In a bathroom, the thermostat cannot go inside the room itself. It is normally fitted on the outside of an internal wall, as close to the heated floor as possible. Step 8: Lay the New Floor Tile directly over the heating using a flexible adhesive and grout approved for underfloor heating. Cover the mat fully and avoid trapped air under the tiles. Do not use sharp trowels near the cables. Check the heating again with the multimeter once the tiles are down, so any damage shows up before you grout. Step 9: Let It Cure and Switch On Slowly Leave the adhesive and grout to cure for the full time on the pack before you switch the heating on. Then raise the temperature a little at a time over several days, so the floor warms gently without cracking. Electric or Water Underfloor Heating for a Bathroom? Feature Electric underfloor heating Water underfloor heating Floor height added About 2 to 15mm About 15mm to 50mm or more Best for Small rooms and retrofit work Larger areas and full renovations Heats up Quickly Slower Connects to A fused supply with an RCD Your central heating system Installation Simple, but needs an electrician for the final connection More complex, needs planning How Much Height Will Underfloor Heating Add? Electric systems add the least. A heating mat on slim insulation boards usually adds around 2 to 15mm, depending on the boards you pick. Water systems need more room. Low profile retrofit boards add roughly 15 to 25mm, and a full screed adds far more. That extra height is why most bathroom retrofits use electric mats. Always measure your doors and thresholds before you order, because a few millimetres can decide which system fits. Is Underfloor Heating Safe in a Bathroom? Yes, when it is installed correctly. Heating cables have an earthed sheath that carries any leakage away from the floor surface, and the 30mA RCD cuts the power if a fault appears. Use a floor sensor thermostat so the floor never overheats Keep the thermostat outside the bathroom or outside the zones near the bath and shower Have a registered electrician make the final connection and test the system Can You Fit Underfloor Heating Over Existing Tiles? Usually not in the way people hope. Most systems sit beneath the floor finish, so the old tiles are lifted and new tiles laid on top of the heating. Some slim overlay systems can
How to Waterproof a Bathroom Floor Without Removing the Tiles?
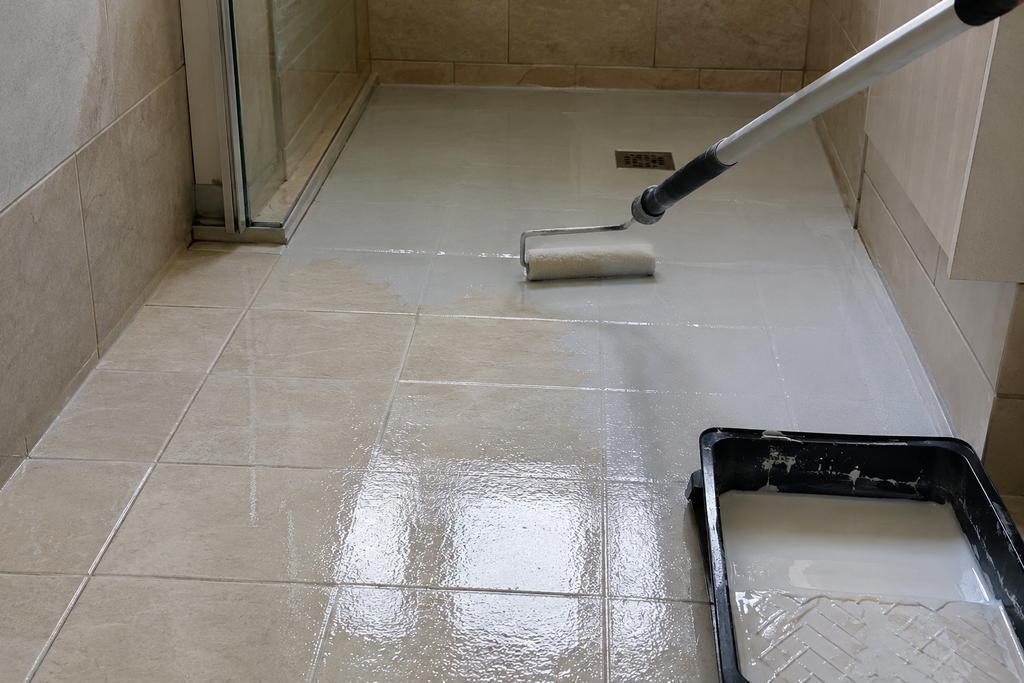
Quick answer: To waterproof a bathroom floor without removing the tiles, find and fix any pipe leak first, then rake out the cracked grout and refill the joints with waterproof grout, and replace the silicone at every edge. For full protection, clean and prime the old tiles, roll on a liquid membrane and tile over it. This guide gives you every step in order, with what to use and what to check. The Full Step by Step Method to Waterproof a Bathroom Floor Without Removing the Tiles = What You Need Before You Start A grout saw or an oscillating tool with a grout blade Waterproof grout, either epoxy or a water resistant cementitious type, and a rubber float Mould resistant sanitary silicone and a sealant gun Masking tape and a finishing tool Primer, liquid membrane and reinforcing tape for the full waterproof route A dust mask, goggles and a vacuum 1 Find Out Where the Water Is Coming From Grout cannot be blamed for a pipe leak, so check the cause first. Look for these signs: Water stains on the ceiling below the bathroom Damp or soft patches around the bath, shower tray or toilet Black mould along the grout lines or skirting A stain that grows when nobody is using the bathroom, which points to a pipe or waste leak If you suspect a pipe, our water leak detection service can trace the source before you spend money on the wrong repair. Not sure whether the leak is from a pipe or the grout? Get your free quote Call 07477 863654 2 Check Every Tile Is Firmly Bonded Tap each tile with the handle of a screwdriver. A hollow sound means the tile has come away from the floor. Lift and rebed any loose tile before you do anything else Replace cracked or chipped tiles Stop and read the section on removing tiles if many of them sound hollow 3 Clean the Floor Properly Sealant, grout and membrane will not stick to dirt or damp. Remove soap scum, limescale and mould with a suitable bathroom cleaner, rinse well, and let the floor dry completely. A fan or dehumidifier speeds this up. 4 Rake Out the Old Grout Run the grout saw along each joint, keeping the blade away from the tile edges Remove the old grout to at least two thirds of its depth Vacuum every joint so no dust or crumbs are left behind Wipe with a damp cloth and let the joints dry 5 Refill the Joints With Waterproof Grout Mix the grout exactly as the pack says. Epoxy grout has a short working time, so mix small batches. Press it into the joints with a rubber float, working diagonally across the tiles Wipe the excess off the tile face straight away, because epoxy is very hard to remove once set Let it cure for the time on the pack before the floor gets wet 6 Replace the Silicone at Every Edge Silicone is for movement joints, so use it where the floor meets the wall, around the bath and shower tray, around the toilet base and around pipes. Important: do not use silicone to fill the grout lines between floor tiles. Cut out all the old silicone and clean the gap, because new sealant will not stick to old Mask both sides of the joint with tape for a neat line Apply a steady bead of mould resistant sanitary silicone Smooth it with a finishing tool and peel off the tape while it is still wet Leave it to cure for the time on the pack, often 24 hours, before water touches it Steps 1 to 6 are enough for most floors. Carry on only for a full waterproof layer. 7 Prime the Tiles and Apply a Liquid Membrane A liquid membrane is a flexible coating that forms a waterproof layer. Check that the maker says tiles can be laid over it. Prime the tiles with the primer the membrane maker recommends for glazed surfaces Press reinforcing tape into the corners, the wall and floor joint, and around the waste and pipes Apply the first coat across the whole floor and up the walls to the height the maker advises Add the second coat once the first has dried, following the maker’s timings Let it cure fully before tiling 8 Tile Over the Membrane Use an adhesive approved for the membrane you chose Pick slim tiles to keep the rise in floor height small Check doors, thresholds and the toilet pan before you start, because the floor will sit higher Grout and seal the new tiles using Steps 5 and 6 9 Test the Floor Before Normal Use Wait for the full cure time of every product Run the shower or pour water near the edges and look for seepage Check the ceiling below and the skirting over the next day Reseal any gaps straight away Which Grout Is Best for a Bathroom Floor? Grout type Best for Watch out for Epoxy grout Floors that get very wet, such as wet rooms Harder to use and clean Water resistant cementitious grout Most bathroom floors, easy to apply Porous, so it may need sealing Flexible grout Floors with slight movement, such as timber Check the pack suits wet areas Always choose a grout labelled for wet areas, and follow the manufacturer’s instructions. Is Tile Grout Waterproof? Tiles are waterproof, but standard cement grout is not. It is porous, which is why most bathroom floor leaks begin in the joints. Epoxy and water resistant grouts hold out water much better, but even they cannot fix a pipe leak or a failed waterproof layer underneath the tiles. Can Sealers and Surface Coatings Waterproof a Bathroom Floor? Sealers and paint on coatings are often sold as quick fixes. A grout sealer can help repel water and stains from clean, sound grout, and it is a useful finishing step after regrouting. But a sealer on its own is not
Can I Get Just My Shower Replaced Without a Full Refit?
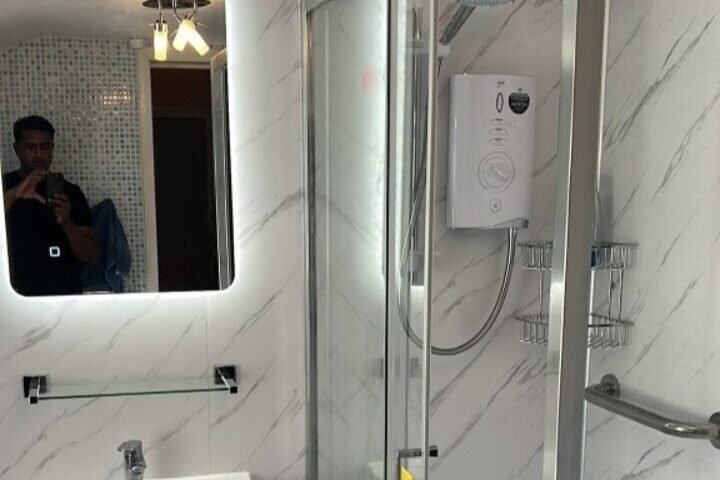
Quick answer: Shower replaced without a full refit? Yes, you can. In most homes a shower replacement is a separate job from a full bathroom refit. A new shower head, shower valve or electric shower can often be swapped in half a day. A new shower tray and shower enclosure takes longer, usually one to two days, but it still does not mean ripping out the whole bathroom. This guide explains which jobs are simple, how long each one takes, and when a bigger project makes more sense. The Quick Answer: What You Can Replace on Its Own Shower head, hose and riser rail. A simple swap with no tiling and no pipework changes. Shower valve or mixer. Often straightforward when the valve is exposed on the wall. Electric shower. A like for like swap on an existing circuit is a short job. Shower tray and enclosure. Possible without touching the rest of the bathroom, but the tiles around the base usually need work. Shower pump. If a pump fails, it is normally replaced on its own. The answer depends on three things: the type of shower you have, what sits behind the wall, and whether the new shower matches the old one. Want a plumber to look at your shower? or call Now Shower Replaced Without a Full Refit: Which Jobs Qualify Which Shower Replacements Do Not Need a Full Refit Most shower jobs are simple swaps. Find your job below to see how big it really is. Easiest job Replacing a shower head, hose or riser rail The old parts come off and the new ones go on. Nothing behind the tiles is touched. Your shower works but looks tired, or the hose has split? This is all you need. Simple to moderate Replacing a shower valve or mixer A thermostatic mixer shower blends hot and cold water through one valve. There are two main types: Exposed bar valve. Sits on the wall surface. Replacing the whole valve is usually simple and often better than fitting a new cartridge. Concealed valve. Sits behind the tiles. A like for like swap can work through the existing opening, but a different valve may mean opening the wall. Same cable, same pipes Replacing an electric shower An electric shower heats its own water from the cold mains. If the new unit matches the old one in power and position, the job uses the same cable and the same pipe connections. Check the rating first. A more powerful unit may need a thicker cable. Bigger job, still not a refit Replacing a shower tray and enclosure A leaking or cracked tray needs full replacement. The usual steps are: Remove the enclosure panels and the old tray. Fit the new tray level, with a new waste. Seal and waterproof the edges. Refit the enclosure and screen. This is a bigger job, but it is still a shower job, not a refit. How Long a Shower Replacement Takes and What Slows It Down Most shower jobs are quicker than people expect. Here is a rough guide to the time and disruption for each one. Job Typical time Mess and disruption New shower head, hose and rail Under an hour None Electric shower, like for like Half a day Low Mixer shower valve, like for like Half a day Low, or medium if the valve is concealed Tray and enclosure replacement 1 to 2 days Medium, and the sealant needs time to set What slows a shower replacement down A concealed valve that needs the wall opened New tiles or wall panels, which add fitting and drying time Pipework that has to be moved or replaced Parts that are not on site, such as a tray in a special size Electrical work to bring the cable up to standard Can You Replace a Shower Without Removing the Tiles? Sometimes. It depends on what you are replacing. Yes Shower head, hose and exposed valve: usually no tile removal. Maybe Concealed valve: often possible through the existing hole, but not always. Yes Electric shower: when the new unit fits the old position. No Shower tray: the tiles around the base normally have to come off. If the new shower will not line up with the old tile pattern, you have options: Option 1Retile only the shower area and add a border or feature strip Option 2Fit wall panels in the shower space Option 3Retile the whole wall if you want a perfect match Tell your plumber early which option you prefer, because it changes the price. Check Your Water System Before You Choose a New Shower Your hot water system decides which shower will work well. A shower that is wrong for your system will disappoint you, however good it looks. Works well Combi boiler A thermostatic mixer shower usually works well. An electric shower is another option. May need a pump Gravity fed system with a loft tank Pressure is often low, so you may need a shower pump to get a good flow. Works well Unvented cylinder Pressure is usually strong, so most mixer showers work well. Check first Pump already fitted Check that your new shower is compatible with it. Electrical Rules When You Replace an Electric Shower Under Part P of the Building Regulations, installing a new circuit for an electric shower is notifiable work. Replacing an existing electric shower with a new one on the same circuit is not notifiable, as long as it is a like for like swap. That is why it is worth checking the circuit before you pick the new model. If the new shower is more powerful, the cable and the protective device may be too small, and then the job can become notifiable. The work should be done by a competent person, and you should ask what certificate you will receive when it is finished. If an electrician is needed, a good plumber will tell you plainly at the quote stage. When a Full Refit
Should I Replace Lead Pipes During a Bathroom Refit?
Quick answer: Yes, in most homes you should. If any pipe that brings you drinking water is made of lead, replace it while your bathroom is already open. It costs less and makes less of a mess than doing it later. Why a bathroom refit is the best time to replace lead pipes Lead pipes were common in homes built before 1970, says the Drinking Water Inspectorate. One estimate says about one in three UK homes still has some lead pipe in its water supply. A bathroom refit is the best moment to deal with it. Here is why. The floors and walls are open. Your plumber can see the pipes and reach them with ease. You pay for access once. Later, you would pay again to lift the floor and open the wall. New tiles are about to go on. A pipe hidden behind new tiles is hard and costly to reach. The water is already off. There is less upset for your family. You can plan the pipe route. The new bath, shower and toilet can go in the right place from day one. Think of a refit as a short window. Once the new tiles are fixed, the window closes. Lead pipe left behind a finished wall may stay hidden for many more years. How to tell if you have lead pipes Start with the age of your home. If it was built before 1970, it may have lead pipes. If it was built after 1970, it is unlikely. Then look at the pipes. Find the pipe where water enters your home. It is often under the kitchen sink or in the bathroom. It has a tap on it called the internal stop tap. This tap turns off all the water to your home. Here is how to spot lead: The lead pipe is dull grey. It is soft and bends with ease. Joints often look like round lumps, not neat fittings. Scratch it gently with a coin. Shiny silver metal underneath means it is probably lead. Be gentle when you scratch. Water companies warn that scratching can make a tiny bit of lead dust. Wash your hands after. Look in the loft too. Old homes can have a lead pipe that runs from the cold water tank. Some old tanks are lead as well. Lead tanks can sit inside a wooden box. Not sure? Ask your plumber to check before the refit starts. Your water company can also test your water. Anglian Water offers a free lead test. Check your water bill to see who supplies your home. Which lead pipes should go and which can stay Not all lead pipes are the same. What matters most is whether drinking water runs through the pipe. Type of lead pipe Does drinking water run through it? What to do Pipe that brings water from the street into your home Yes Replace it Pipe that feeds your bathroom or kitchen taps Yes Replace it Pipe from a lead loft tank Yes Replace it, and the tank too if it is lead Lead solder on copper pipe joints Yes Have the joints redone Lead waste or soil pipe No Replace it if it is cracked, leaking or in the way Lead gas pipe No Call a Gas Safe registered engineer The Drinking Water Inspectorate says the only sure way to remove lead from your water is to take out the lead pipework and fit new plastic or copper pipe. Lead solder is still allowed on closed central heating pipes. It must not be used on pipes that carry drinking water. Lead waste pipes need a note. They carry dirty water away from the toilet, sink and bath. They do not add lead to what you drink. But they are very old. If your plumber moves the toilet or finds a crack, ask about replacing them while the floor is up. What can go wrong if you leave lead pipes in place Leaving lead pipe behind a new bathroom can cause four problems. Lead can get into your water. Water that sits in a lead pipe can pick up lead. The water in the street mains is virtually free of lead. The lead comes from the old pipes it flows through. Children are at most risk. Babies, young children and unborn babies are most at risk. Lead can harm how a child’s brain grows. The refit can stir up lead. Cutting, bending or knocking old lead pipe can make the lead in your water rise for a short time. A good plumber plans for this. Hidden pipes can leak. A leak behind a new tiled wall is a costly surprise. If you ever suspect one, a water leak detection visit can find it. What about joining a new pipe to an old lead pipe? Some people use a special connector and leave the old lead behind the wall. This can work as a short fix. But your water still runs through lead. And the hidden pipe can still wear out. Ask your plumber to take out as much lead as they can reach. If some must stay, ask them to explain why. Suspect a Hidden Leak? or call for a pipe inspection What the replacement job involves Here is how a lead pipe job usually goes. Survey. Your plumber checks which pipes are lead, where they run and where they leave your home. Plan. The plumber plans a new pipe route that fits your new bathroom layout. If the pipe in the street is lead too, your water company needs to know. Remove the old pipe. The water is turned off. The plumber takes out the lead pipe they can reach in the floor, walls and loft. Fit the new pipe. New pipe is copper or plastic made for drinking water. Outside, a blue plastic pipe is common. Test and flush. The plumber checks every joint for leaks and flushes the new pipes. Clear away and record. Old lead